Scheduler
With the scheduler control you can display documents in a calendar or a timeline view. The benefit of this type of view is that the position on the calendar already provides additional information about the document. After all, users can already see the date and time for each document.
Using the scheduler control
As a user, you can determine the view type of the scheduler control:
- Day
- Work Week
- Week
- Month
- Timeline
In the Timeline view you will see documents distributed for a list of resources per hour on the selected date. The administrator defines which resources should be used in the layout editor. An example of a resource could be personnel. In that case a list of all personnel will be displayed in the first column of the scheduler. If there are documents associated with employees in the first column they will be displayed in their respective lines in the scheduler based on their time and date value.
You can change the date (range) by clicking ![]() . To display the current date, you click Today.
. To display the current date, you click Today.
You can toggle between displaying only working hours and displaying the full day by clicking Show full day / Show business hours.
Note: changes to the view settings are not (yet) stored in your user settings. They will be restored to the default as configured by the administrator after you close the layout.
Creating and modifying documents
Depending on the path conditions, configured by the administrator in the menu, you can open document details by single-clicking a document in the scheduler. But in addition to opening documents, the scheduler control also enables you to modify certain document properties:
- You can change the values of the date and/or time fields in the document by dragging the document from one place in the scheduler to another.
- You can change the start date/time or the end date/time by dragging the border of a document, extending or decreasing the timeframe of that document.
- You can delete the document by clicking the cross icon in the top right corner of the document in the scheduler.
- You can create a new document by clicking the position in the scheduler for the time and date of your choice.
Configuring the scheduler control
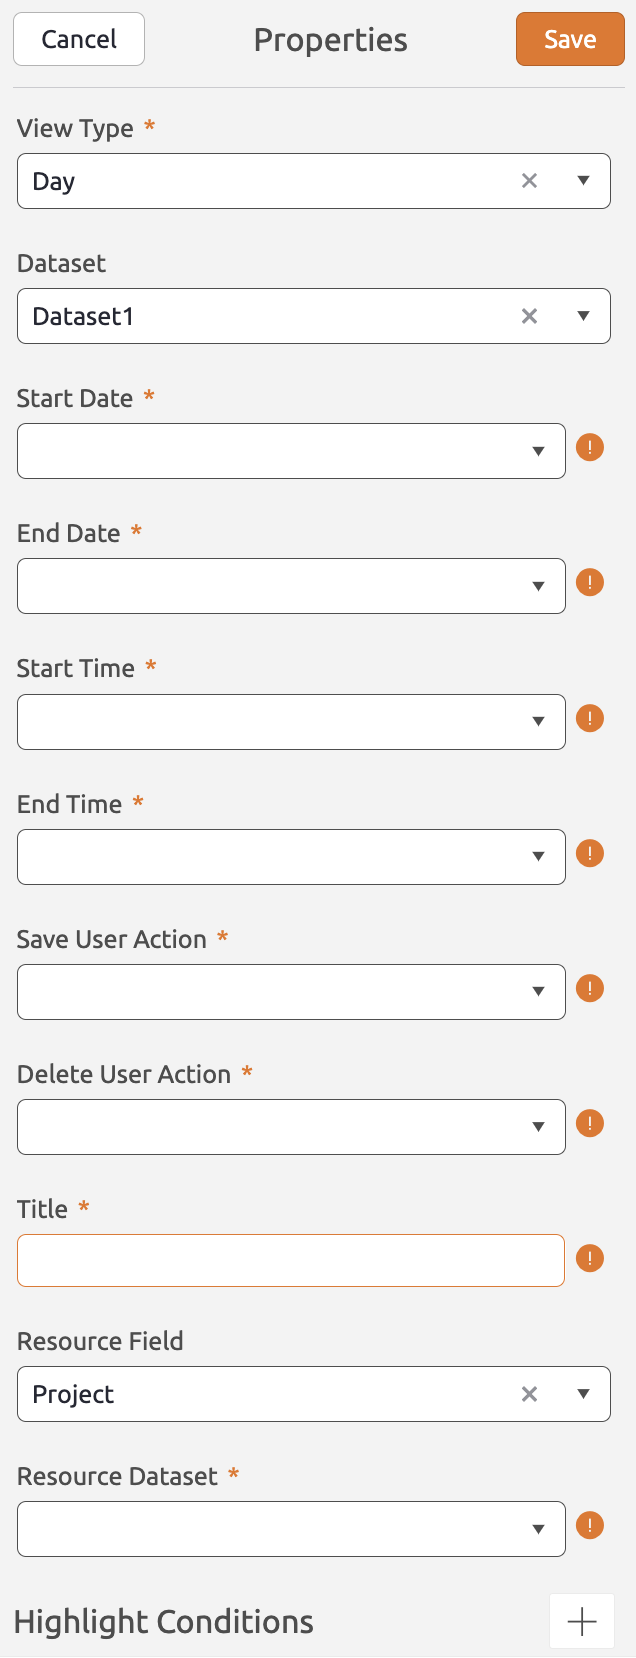
You can add a scheduler control to the layout by simply dragging it from the Generic Controls bar on the left-hand side. After adding the scheduler, it will have a blue overlay. This is an indication that it does not yet have a dataset assigned to it. 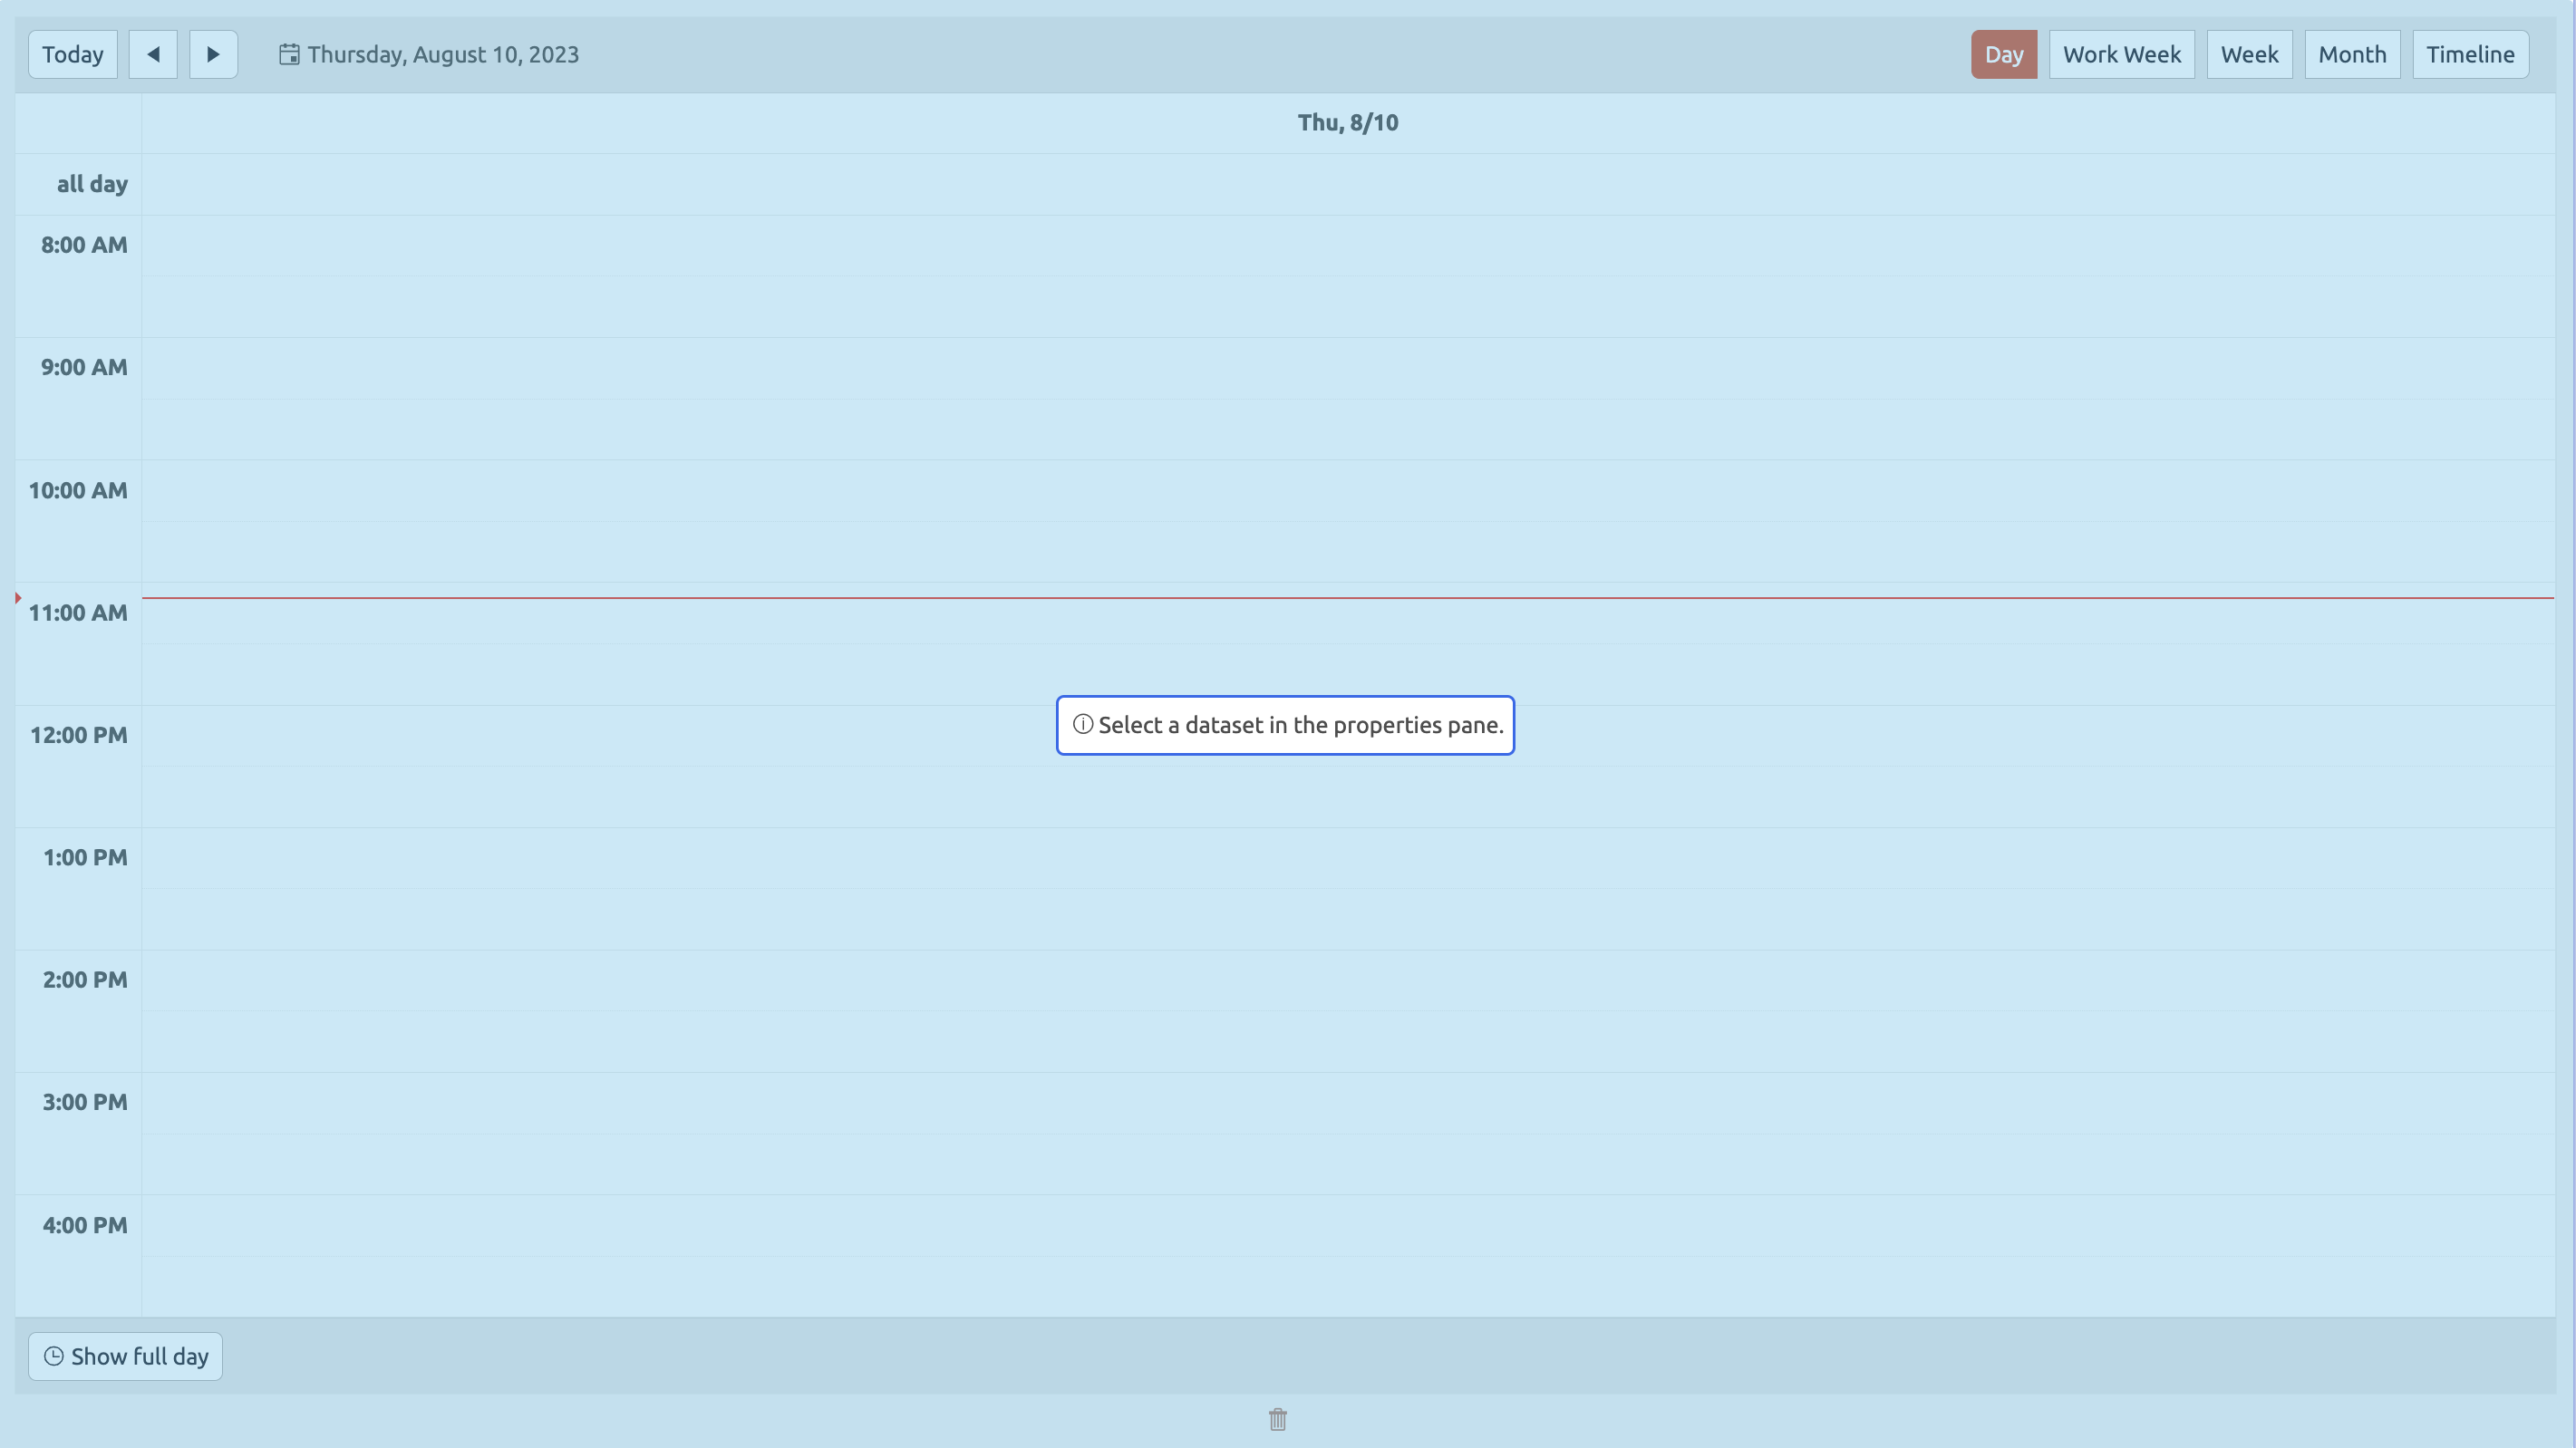 Upon dropping the scheduler, the properties pane will open on the right. Here, you can configure a range of properties that apply to the control as a whole. The scheduler control has the following properties:
Control Name (Required) This is used to reference the scheduler in (for instance) a menu path or a filter. The control name should be unique within a layout. View Type (Required) The view type the user will see upon opening the layout. You can set the view type to Timeline, Day, Work Week, Week, or Month. Users can change the view type after opening the layout to match their preferred setting. Dataset (Required) The dataset from which the scheduler will display documents. This should always be a list dataset. Start Date (Required) Represents the field in the document definition which contains the start date of the document. Based on the value of this field the document is plotted on the scheduler. End Date (Required) Represents the field in the document definition which contains the end date of the document. Based on the value of this field the document is plotted on the scheduler. Start Time (Required) Represents the field in the document definition which contains the start time of the document. Based on the value of this field the document is plotted on the scheduler. End Time (Required) Represents the field in the document definition which contains the end time of the document. Based on the value of this field the document is plotted on the scheduler. Save User Action (Required) Represents the user action in the document definition which is executed to save the document. This user action will be executed whenever a user changes the position or 'size' of the document in the scheduler. Delete User Action (Required) Represents the user action in the document definition which is executed to delete the document. This user action will be executed whenever a user deletes the document directly from the scheduler. Title (Required) The title displayed on the documents in the scheduler. This helps users understand which documents they are looking at. BizzStream expressions can be used to render dynamic titles. Resource Field (Optional) If users choose to view the scheduler as a timeline a list of resources will be displayed. Documents will be rendered based on the value in the field that is selected here. The list of fields to choose from will only contain reference fields in the dataset the scheduler is connected to. Resource Dataset (Required if Resource Field is selected) If a resource field is selected, you need another document list dataset containing the documents from the document definition associated with the selected resource field.That document definition should be selected here. Highlight Conditions (Optional) Allows you to choose a color and configure a BizzStream expression. If the BizzStream expression resolves to true, the color will be applied to the document in the scheduler. Hover Label (Optional) Allows you to see additional information when you hover over a scheduler event item. BML and BizzStream expressions can be used to render dynamic content. |
 |

Work Week Configuration
In addition to the standard Day, Week, Month, and Timeline views, the Scheduler includes a Work Week view. Traditionally, this view displays Monday through Friday. A new configuration option allows administrators to redefine which days are included in the work week. This is useful when organizations use non-standard working patterns, such as Tuesday–Saturday schedules or work weeks that roll across a weekend.
These settings apply only to the Work Week view. All other views remain unaffected.
Work Week Start (Optional) Defines the first day that should appear in the Work Week view. Work Week End (Optional) Defines the last day that should appear in the Work Week view. |
 |
If no values are configured, the default range is Monday → Friday.
How the range is calculated
When both properties are configured, the Scheduler determines the set of displayed days by:
- Starting at the selected Work Week Start day.
- Moving forward through the week day by day.
- Stopping once the Work Week End day is reached.
- Wrapping to the next week if the end day occurs earlier in the week than the start day.
This always produces a continuous sequence of days, regardless of whether the range crosses a week boundary.
Examples
| Work Week Start / End | Resulting Work Week |
|---|---|
| Monday / Thursday | (Mon, Tue, Wed, Thu) |
| Tuesday / Friday | (Tue, Wed, Thu, Fri) |
| Friday / Sunday | (Fri, Sat, Sun) |
| Saturday / Friday | (Sat, Sun, Mon, Tue, Wed, Thu, Fri) |
| Monday / Wednesday | (Mon, Tue, Wed) |
| Thursday / Tuesday | (Thu, Fri, Sat, Sun, Mon, Tue) |